
Example shed plan, start to finish
Gable-roof storage shed on a skid or concrete foundation. This is a real output from the shed calculator — nothing blurred, nothing withheld. Change any dimension and yours regenerates instantly. Estimates only, never a quote.
- Footprint
- 10×8 ft
- Area
- 80 sqft
- Wall height
- 8 ft
- Roof
- 4/12 shingles
- Siding
- lp-smartside
- Foundation
- skid
Scaled diagram
How to read this: the drawing is to scale but not to the inch. Always measure your real site before cutting — these are estimates only, not a construction document.
Full shopping list
Foundation skids (PT 4×4, 12') 2 ea × $28 | $56 |
Floor joists (PT 2×6, 12') 10 ea × $18 | $180 |
Floor decking (3/4" PT plywood 4×8) 4 ea × $42 | $168 |
Wall studs (2×4, 8') 44 ea × $6 | $264 |
Top/bottom plates (2×4, 12') 10 ea × $8 | $80 |
Wall sheathing (7/16" OSB 4×8) 10 ea × $28 | $280 |
Siding (LP SmartSide 4×8) 10 ea × $62 | $620 |
Rafters (2×4 × 6') 14 ea × $10 | $140 |
Ridge board (2×6 × 12') 1 ea × $22 | $22 |
Roof sheathing (1/2" OSB 4×8) 6 ea × $26 | $156 |
Asphalt shingles (bundles, ~33 sqft) 6 bdl × $42 | $252 |
Underlayment roll (~400 sqft) 1 roll × $40 | $40 |
Drip edge (10') 4 ea × $12 | $48 |
Single shed door + hardware 1 ea × $262 | $262 |
Windows 1 ea × $95 | $95 |
Fasteners (nails/screws) 9 lb × $12 | $108 |
| Incl. 10% waste ($270) | $2,771 |
Cut list
- Skids ×24×4 × 10'
- Floor joists ×92×6 × 8'
- Wall studs ×402×4 × 8'
- Wall plates ×92×4 × 12' (cut to wall length)
- Rafters ×122×4 × 6'
- Ridge board ×12×6 × 12'
Before you start — do these four things
Measure twice, on site
Re-measure every dimension at the actual location and compare it to the numbers in this guide before you buy or cut anything.
Call 811 before you dig
Free, and required in most areas. Wait for the utility locates before any post hole, footing, or excavation.
Confirm permits and codes locally
Spans, footing depth, setbacks, and heights are set by your local building department — their answer overrides this guide.
Safety gear on, every step
Eye and ear protection, gloves, dust mask when cutting, and a helper for anything you can't lift alone.
Estimates only — verify measurements, prices, and codes locally. This guide is not a substitute for an engineer or your building official.
How the pros build this shed
Level foundation, framed walls built flat on the deck and raised square, roof framed to a common rafter pattern, weather layers lapped shingle-fashion.
2 people, 3–4 days for a 10×12
Tools a pro shows up with
- Safety glasses
- Work gloves
- Hearing protection
- Framing square + speed square
- Circular saw
- Framing nailer or hammer
- 4 ft level
- Chalk line
- Utility knife
- Ladders
The numbers pros work to
- FoundationLevel within 1/4 in across the footprint
Out-of-level floors make doors bind and walls out of plumb.
- Stud spacing16 in on center (24 in acceptable for light sheds)
Matches 4×8 sheet layout so panel edges land on framing.
- Roof pitchMinimum 3:12 for asphalt shingles with underlayment
Shingles rely on gravity; below that manufacturers require special detailing.
- Weather lapEvery layer laps the one below, bottom to top
Water always runs down — the lap direction is the waterproofing.
General guidance based on common residential practice. Your local building department has the final say — estimates only, never a quote or an engineered design.
Step 1: Foundation and floor
A shed that starts out of level never squares up.
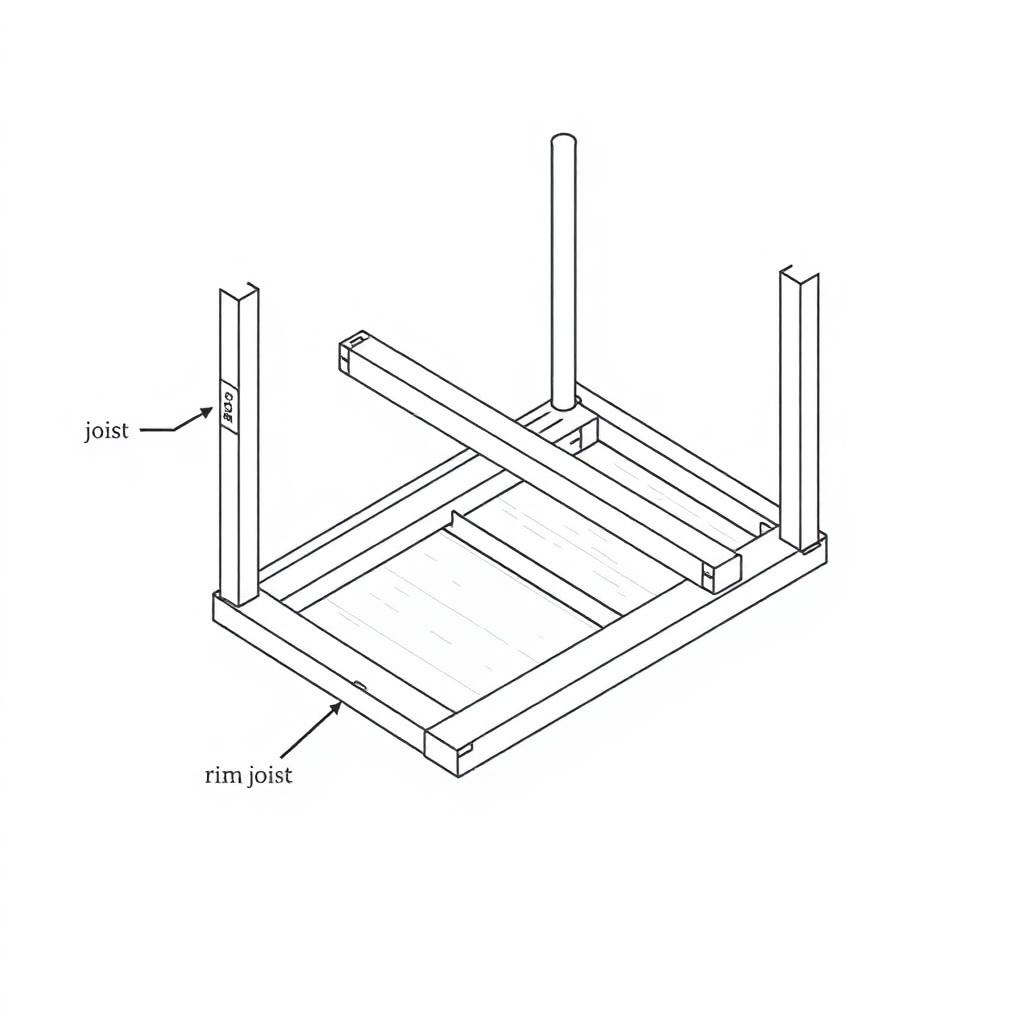
1.1 Level and compact the pad, then set skids or blocks and check across both diagonals.
Pro standard
Compacted gravel base; diagonals equal before the floor frame goes down.
In plain English
Flatten the ground, add gravel, and make sure the base is square by matching corner-to-corner measurements.
1.2 Frame the floor, crown joists up, and sheath with the panel's long edge across the joists.
Pro standard
Stagger panel seams; leave the expansion gap the panel calls for.
In plain English
Run the plywood across the joists and don't line seams up in a row — that's what makes the floor stiff.
Before you move on: Floor level within 1/4 in, diagonals equal, no bounce when you walk the middle.
Step 2: Wall framing
Walls built flat and raised square save a day of shimming later.
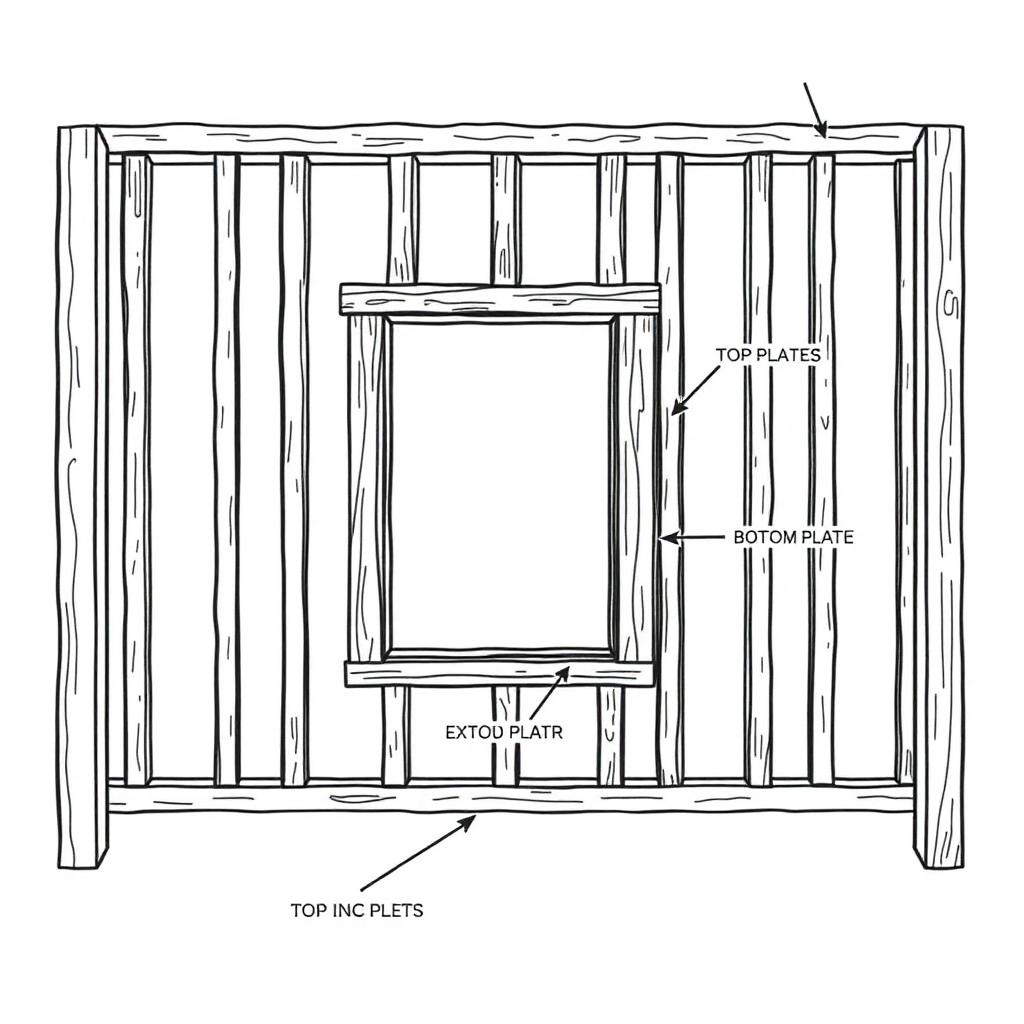
2.1 Lay out plates together, mark studs 16 in on center from one end.
Pro standard
Mark both plates at once so studs land in the same place on top and bottom.
In plain English
Line up the two long boards and mark them at the same time — then every stud is guaranteed square.
2.2 Build each wall flat on the floor deck, sheathe it, then raise and brace it plumb.
Pro standard
Sheathing on the deck squares the wall before it stands up.
In plain English
Assembling on the flat floor means the wall can't be a parallelogram when you stand it up.
2.3 Frame door and window openings with a header sized to the span.
Pro standard
Header plus jack studs carry the load around the opening.
In plain English
The beam over the door has to hand the weight down to short studs on each side.
Before you move on: All walls plumb and braced, corners tied together, top plates lapped at the corners.
Step 3: Roof
The roof is the whole reason the shed exists.
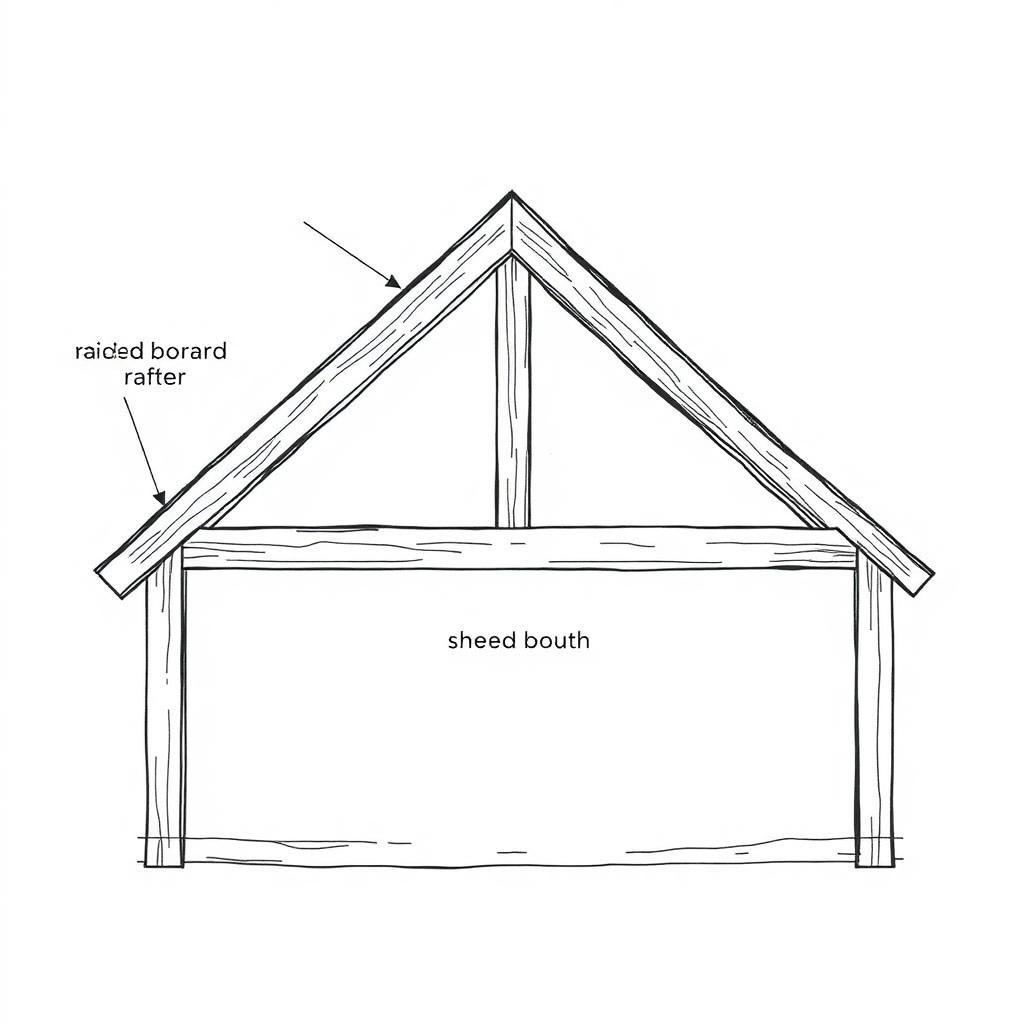
3.1 Cut one rafter as a pattern, test-fit it, then trace all the rest from it.
Pro standard
One pattern rafter with birdsmouth and plumb cuts; never mark from a copy of a copy.
In plain English
Cut one perfect rafter, check it fits, and use it as the template for all the others.
3.2 Sheathe, then run underlayment and shingles from the eave upward with correct lap.
Pro standard
Drip edge under the underlayment at the eave, over it at the rakes.
In plain English
Start at the bottom and work up so every layer covers the one below — like fish scales.
Before you move on: Ridge straight when sighted, no rafter tail out of line, roof dries out fully after a hose test.
Step 4: Siding, doors and trim
Details here decide whether the shed still looks good in five years.
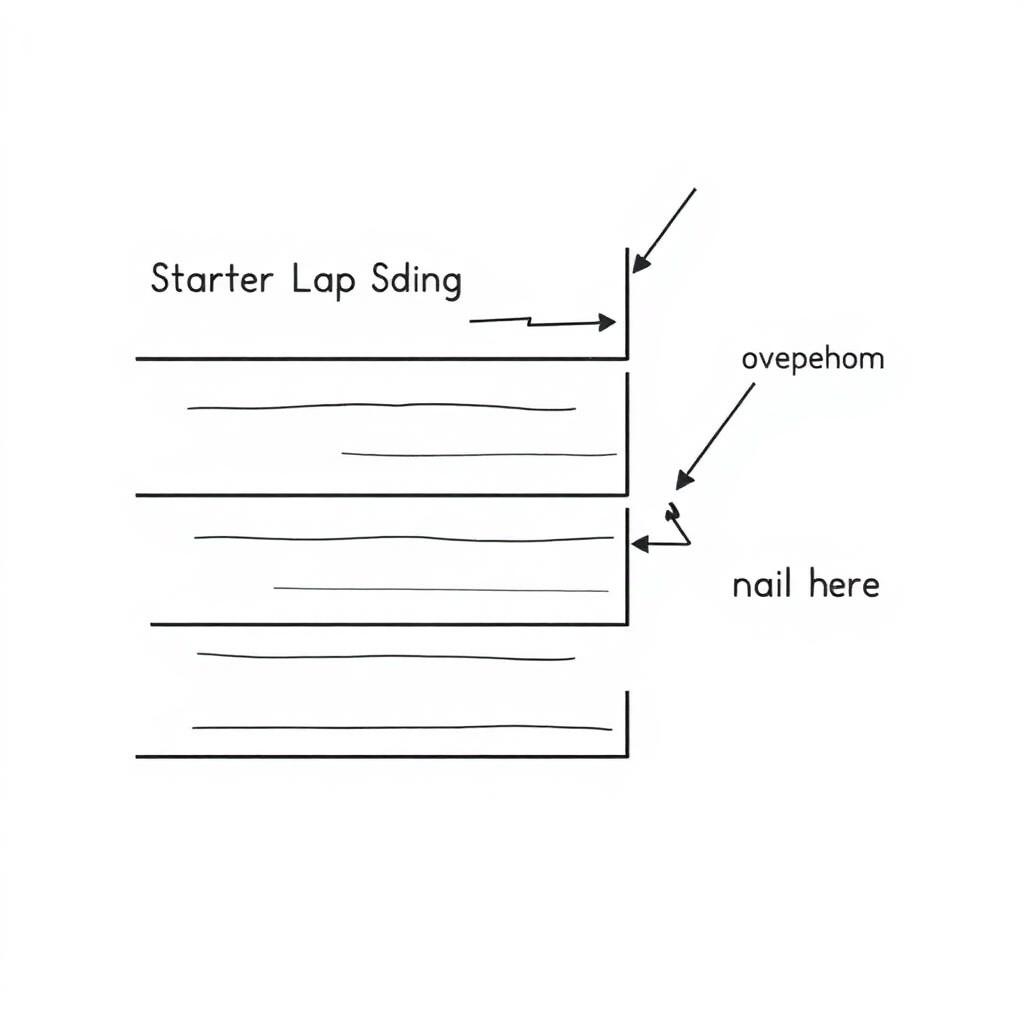
4.1 Install a weather-resistive barrier, then siding lapped bottom to top.
Pro standard
House wrap lapped shingle-style and taped at openings.
In plain English
Wrap it before siding so any water that sneaks past runs down and out.
4.2 Hang doors plumb with shims and check the reveal top to bottom.
Pro standard
Even reveal on both sides indicates a plumb, unracked opening.
In plain English
The gap around the door should be the same all the way around — that's how you know it will keep closing.
Before you move on: Doors latch without force, siding gaps caulked, no exposed panel edges.
What goes wrong most often
- Building on an unlevel pad and 'fixing it' with shims under the walls.
- Lapping weather layers the wrong direction so water runs behind the siding.
- Cutting every rafter individually — small errors add up to a wavy roof.
Permit checkpoints
- Set your state for localized rules
Permit thresholds, frost-line depth, and fence-height caps vary a lot by state. Pick your state above to tailor this checklist.
- Confirm the 120 sq ft exemption applies locally
Your shed is 80 sq ft. Most areas exempt sheds under 120 sq ft, but some cities require a permit for anything with a permanent foundation. Call your building department to confirm — a 5-minute call.
- Confirm setbacks from property lines
Typical rule: sheds must sit at least 5 ft from side/rear property lines and behind the front building line of your house. Some jurisdictions require 10 ft. Pull your plat.
- Call 811 before digging or setting skids
Free U.S. utility locate service. Required by law before ANY digging — including leveling a gravel pad. Schedule 3 business days out.
- Check HOA / neighborhood covenants
HOAs commonly restrict shed size, siding color, roof style (must match house), and location. Get written approval before ordering materials.
- Level and compact the gravel pad before setting skids
Excavate 4" of topsoil, lay landscape fabric, add 4" of compacted 3/4"-minus gravel. If the pad isn't level, the shed will rack and doors won't close.
Rules vary by city and county — always confirm with your local building department. Estimates only, not a permit determination.
Plan it. Price it. Build it.
Enter your own dimensions and get this same plan for your yard — plus the build guide, permit packet and printable PDFs.
Start my shed