
Example pergola plan, start to finish
4-post pergola with rafters and optional slats. This is a real output from the pergola calculator — nothing blurred, nothing withheld. Change any dimension and yours regenerates instantly. Estimates only, never a quote.
- Footprint
- 12×10 ft
- Post
- 6x6 cedar
- Height
- 8 ft
- Rafter spacing
- 16"
- Slats
- yes
- Area
- 120 sqft
Scaled diagram
How to read this: the drawing is to scale but not to the inch. Always measure your real site before cutting — these are estimates only, not a construction document.
Full shopping list
Posts (cedar 6x6 × 12') 4 ea × $222 | $888 |
Beams (cedar 2×10 × 12') 8 ea × $44 | $352 |
Rafters (cedar 2×8 × 12') 11 ea × $28 | $308 |
Top slats (cedar 2×2 × 8') 53 ea × $10 | $530 |
Post base brackets 4 ea × $24 | $96 |
Concrete (50lb bags) 20 bag × $7 | $130 |
Structural screws / lag bolts 3 lb × $14 | $42 |
| Incl. 10% waste ($78) | $2,346 |
Cut list
- Posts ×46x6 × 11'
- Beams ×42×10 × 14'
- Rafters ×102×8 × 12'
- Top slats ×242×2 × 12'
Before you start — do these four things
Measure twice, on site
Re-measure every dimension at the actual location and compare it to the numbers in this guide before you buy or cut anything.
Call 811 before you dig
Free, and required in most areas. Wait for the utility locates before any post hole, footing, or excavation.
Confirm permits and codes locally
Spans, footing depth, setbacks, and heights are set by your local building department — their answer overrides this guide.
Safety gear on, every step
Eye and ear protection, gloves, dust mask when cutting, and a helper for anything you can't lift alone.
Estimates only — verify measurements, prices, and codes locally. This guide is not a substitute for an engineer or your building official.
How the pros build this pergola
Footings set square, posts braced plumb, doubled beams through-bolted, rafters and slats laid out to an even spacing.
2 people, 2 days for a 12×12
Tools a pro shows up with
- Safety glasses
- Work gloves
- Hearing protection
- Post-hole digger
- 4 ft level
- String line
- Circular saw + jigsaw
- Socket set
- Drill with auger bits
- Ladders
The numbers pros work to
- Post size6×6 typical for spans over 10 ft
Slenderness and wind uplift, not just gravity load.
- Beam connectionThrough-bolted both sides with washers
Bolts in double shear; lag screws into end grain are weak.
- Rafter spacing16–24 in on center depending on span and shade goals
Deflection over the span plus the amount of shade you want.
- Overhang12–18 in beyond the beam, cut to a matching pattern
Balances proportion and keeps the tail from splitting.
General guidance based on common residential practice. Your local building department has the final say — estimates only, never a quote or an engineered design.
Step 1: Layout and footings
Four posts out of square is the one error you can see from the house.
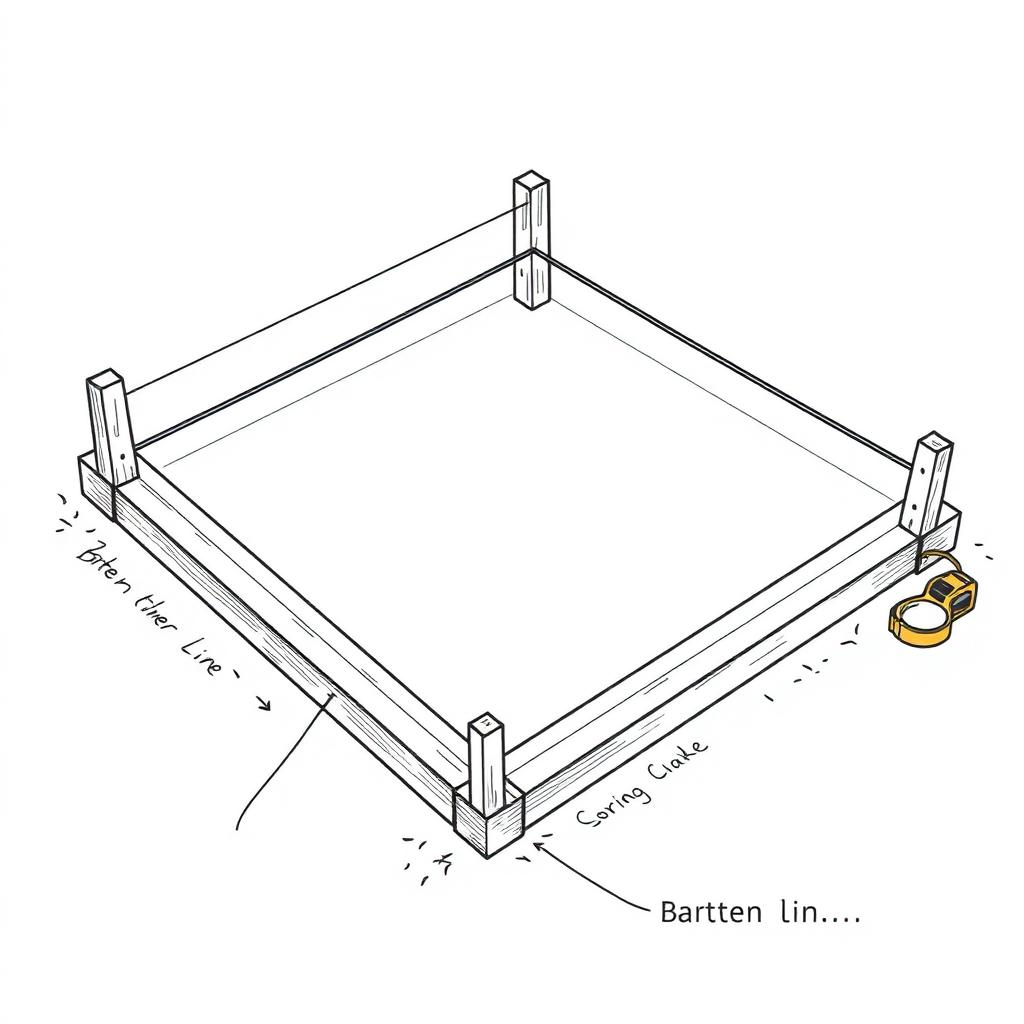
1.1 Square the footprint with equal diagonals, then dig footings below frost.
Pro standard
Diagonals within 1/4 in; footing bears on undisturbed soil.
In plain English
Match the corner-to-corner measurements before you dig, and dig deep enough that frost can't lift them.
1.2 Set posts long and cut to height in place.
Pro standard
Cut to a shared level line marked with a laser or water level.
In plain English
Leave the posts too tall, then mark them all at one height and cut — much easier than getting each hole perfect.
Before you move on: Posts plumb both directions, tops cut to one level line, diagonals still equal.
Step 2: Beams
The beams carry everything and set the whole structure's rigidity.
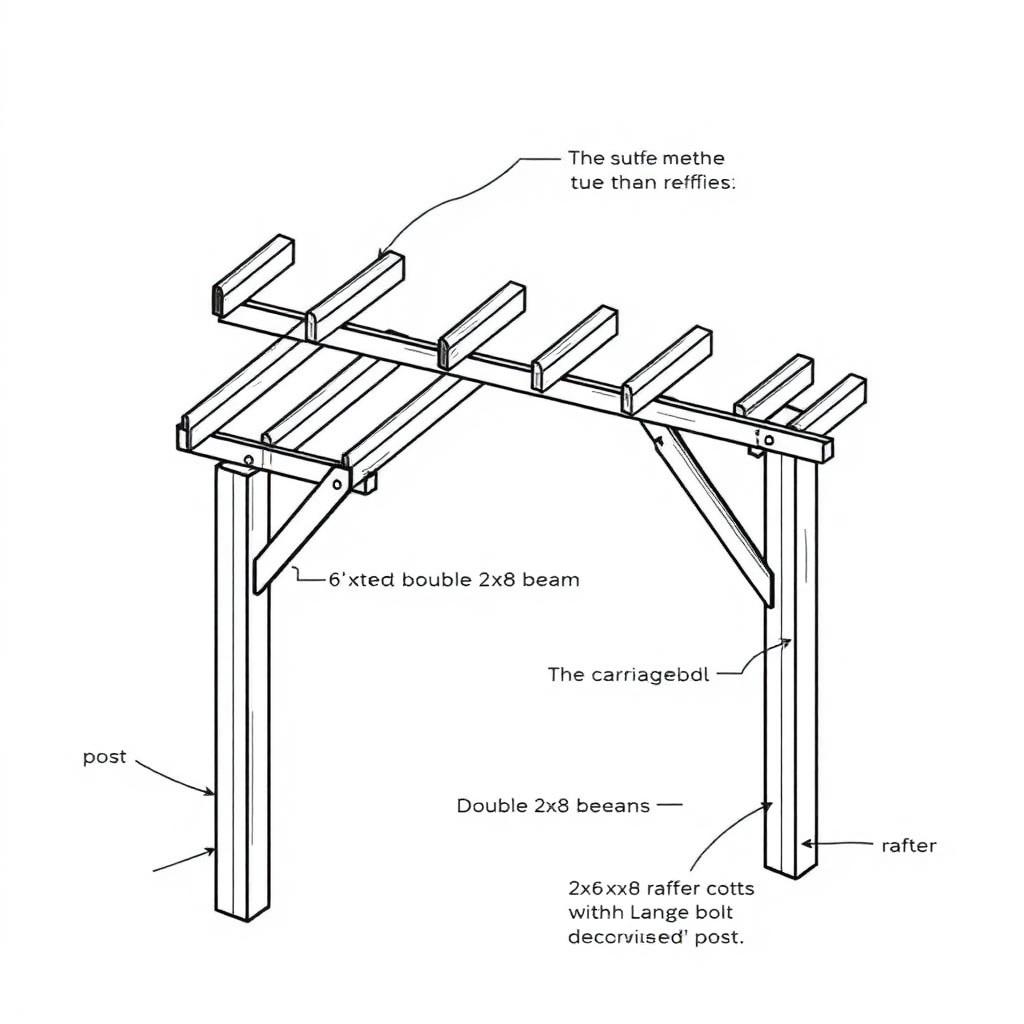
2.1 Sandwich the posts with paired beams and through-bolt with washers on both faces.
Pro standard
Stagger bolts vertically; do not bolt into the very edge of the member.
In plain English
Put one beam each side of the post and run bolts all the way through — that grip is what keeps the frame from racking.
2.2 Add knee braces at each post-to-beam corner.
Pro standard
45° braces resist lateral sway.
In plain English
The short diagonals in the corners are what stop the pergola swaying in the wind.
Before you move on: Beams level, bolts snug with washers biting, structure doesn't rack when pushed.
Step 3: Rafters and slats
Spacing consistency is the whole visual effect.
3.1 Mark rafter spacing on both beams at once, then set rafters with hurricane ties or screws.
Pro standard
Uplift connectors matter — a pergola roof is a sail.
In plain English
Mark both sides together so rafters run square, and use metal ties so wind can't lift them.
3.2 Cut all rafter tails to one pattern with a jig.
Pro standard
One template gives an identical profile on every tail.
In plain English
Make one decorative end cut, trace it on all the others, and the finished look is crisp.
Before you move on: Even spacing measured at both ends, tails aligned on a string line, no rafter twisted.
What goes wrong most often
- Lag-screwing beams to the side of a post instead of through-bolting.
- Skipping knee braces — the frame racks and bolts loosen.
- Setting posts to final height in the hole and discovering the tops don't line up.
Permit checkpoints
- Set your state for localized rules
Permit thresholds, frost-line depth, and fence-height caps vary a lot by state. Pick your state above to tailor this checklist.
- Call 811 before digging footings
Free U.S. utility locate. Required before setting concrete post holes. Schedule 3 business days out.
- Check property line setbacks
Pergolas are structures — most cities require the same 5–10ft setbacks as sheds. Confirm before locating your corners.
- HOA / neighborhood approval
Many HOAs restrict outdoor structures. Get written approval before ordering lumber.
- Confirm the residential-accessory exemption
120 sq ft pergolas often fall under the accessory-structure exemption, but always verify — a 5-minute call to the building department.
- Required approvals to line up
• Zoning setback approval • Building permit if over 200 sqft or 10 ft tall • HOA architectural approval Call your local building department to confirm which of these apply in your jurisdiction — requirements vary city to city.
Rules vary by city and county — always confirm with your local building department. Estimates only, not a permit determination.
Plan it. Price it. Build it.
Enter your own dimensions and get this same plan for your yard — plus the build guide, permit packet and printable PDFs.
Start my pergola