
Example concrete flatwork plan, start to finish
Driveways, walks, aprons and steps with joints and finish. This is a real output from the concrete flatwork calculator — nothing blurred, nothing withheld. Change any dimension and yours regenerates instantly. Estimates only, never a quote.
- Type
- driveway
- Size
- 40×12 ft
- Thickness
- 5"
- Base
- 6"
- Concrete
- 8.05 cu yd
- Finish
- broom
Scaled diagram
How to read this: the drawing is to scale but not to the inch. Always measure your real site before cutting — these are estimates only, not a construction document.
Full shopping list
Ready-mix concrete (delivered) 8.86 cu yd × $172 | $1,524 |
Compacted gravel base (3/4"-minus) 9.78 cu yd × $42 | $411 |
Form lumber (2×6 × 12') 10 ea × $13 | $130 |
Form stakes 42 ea × $2 | $84 |
Expansion joint material 104 ft × $1 | $73 |
Finishing tools (float, edger, groover, broom) 1 kit × $78 | $78 |
Rebar #4 (18" grid) 766 ft × $1 | $421 |
Joint sealant (saw-cut joints) 76 ft × $1 | $84 |
Concrete sealer (broom finish) 2 gal × $34 | $68 |
| Incl. 10% waste ($228) | $2,872 |
Cut list
- Forms – long sides ×22×6 × 40'
- Forms – ends ×22×6 × 12'
- Control joints ×411' panels
- Rebar – long runs ×9#4 × 40'
- Rebar – short runs ×28#4 × 12'
Before you start — do these four things
Measure twice, on site
Re-measure every dimension at the actual location and compare it to the numbers in this guide before you buy or cut anything.
Call 811 before you dig
Free, and required in most areas. Wait for the utility locates before any post hole, footing, or excavation.
Confirm permits and codes locally
Spans, footing depth, setbacks, and heights are set by your local building department — their answer overrides this guide.
Safety gear on, every step
Eye and ear protection, gloves, dust mask when cutting, and a helper for anything you can't lift alone.
Estimates only — verify measurements, prices, and codes locally. This guide is not a substitute for an engineer or your building official.
How the pros build this concrete flatwork
Compacted base to grade, braced forms with drainage slope, reinforcement on chairs, pour, screed, float, joint, broom and cure.
3+ people on pour day; forms and base ahead of it
Tools a pro shows up with
- Safety glasses
- Work gloves
- Hearing protection
- Rubber boots
- Plate compactor
- Screed board
- Bull float
- Edger and groover
- Broom
- Wheelbarrows
The numbers pros work to
- Thickness4 in walks and patios; 5–6 in for driveways
Vehicle point loads crack thin slabs at the edges first.
- Base4 in compacted granular base, uniform under the whole pour
Soft spots become the crack.
- Slope1/8–1/4 in per foot away from buildings
Flat flatwork ponds and spalls in freeze-thaw.
- JointsCut to 1/4 of the depth; panels roughly square, not long and thin
Long, narrow panels crack across the middle regardless of joints.
- CuringMoist cure or curing compound for several days
Surface durability comes from a proper cure.
General guidance based on common residential practice. Your local building department has the final say — estimates only, never a quote or an engineered design.
Step 1: Base and forms
The base determines the crack pattern more than the mix does.
1.1 Excavate to depth, compact base in lifts, verify grade with a string and level.
Pro standard
Uniform compaction; no soft or reworked pockets.
In plain English
Dig out the soft dirt, add gravel in layers and pack each layer hard so nothing settles later.
1.2 Set and brace forms to the drainage slope.
Pro standard
Stakes every 2–3 ft; forms braced against concrete head pressure.
In plain English
Wet concrete pushes the boards out. Stake them often, and tilt them so water drains away from the house.
Before you move on: Grade uniform, slope confirmed, forms tight with no gaps at joints.
Step 2: Reinforce and pour
One shot, no do-overs.
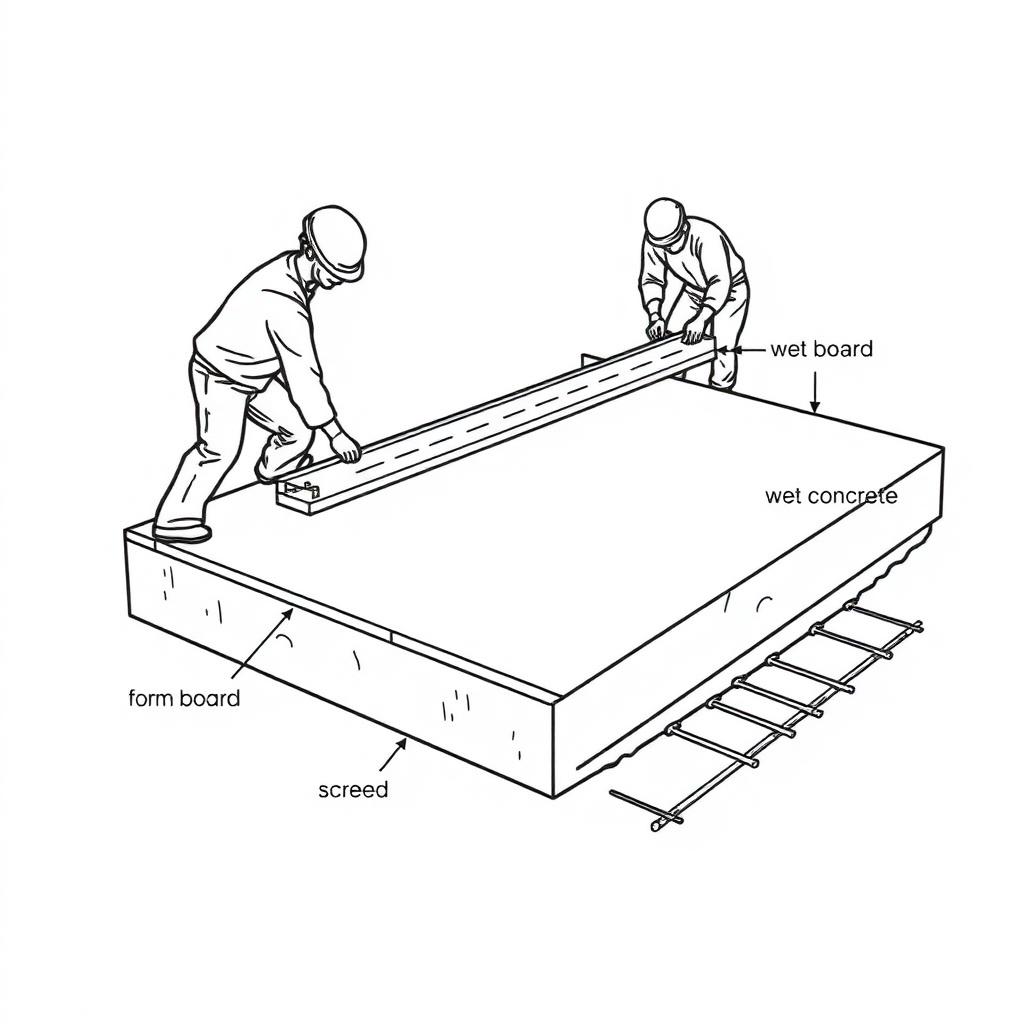
2.1 Set steel on chairs, then place concrete in a continuous pour.
Pro standard
Avoid cold joints; keep the pour moving.
In plain English
Hold the steel up off the ground, and pour without long breaks so it all sets as one piece.
2.2 Screed to the forms, bull float, then wait for the bleed water to disappear.
Pro standard
No finishing while surface water is present.
In plain English
Level it, smooth it, then stop and wait until the shine is gone before touching it again.
Before you move on: No cold joints, surface true to the forms, steel still in position after placement.
Step 3: Joint, texture, cure
Cracks, grip and lifespan are all decided here.
3.1 Edge, then tool or saw control joints to depth on the planned layout.
Pro standard
Saw-cut early (within the manufacturer's window) or tool while plastic.
In plain English
Cut grooves so when it cracks — and it will — the crack hides in the groove.
3.2 Broom the surface across the direction of travel, then cure.
Pro standard
Texture for slip resistance; cure wet or with compound.
In plain English
Drag a broom across for grip, then keep it damp for a few days so it gets strong.
Before you move on: Joints at planned spacing and depth, texture consistent, cure started the same day.
What goes wrong most often
- Skipping control joints and getting random cracks across the middle.
- Adding water to the mix at the truck to make it easier — it permanently weakens the slab.
- Finishing too early while bleed water is still on the surface.
Permit checkpoints
- Call 811 before you excavate
You're removing 11" of material across 480 sq ft. Free, required by law, and takes a few days — schedule it before the concrete order.
- Right-of-way / curb-cut permit
Any driveway or apron that touches the public sidewalk, curb or street needs a separate right-of-way permit from the city or state DOT, and the apron usually has to be built to their published detail — often 6" thick with specified rebar.
- Impervious-surface limits
Most municipalities cap the percentage of a lot that can be paved, and stormwater rules may require the runoff to stay on your property. Widening a driveway is the most commonly-cited unpermitted improvement.
- Building permit likely required
Flatwork over 200 sq ft (yours is 480 sq ft) usually needs a permit, especially where it changes drainage or supports vehicles.
- Pitch away from the house at 1/8" per foot
Over 12ft of width that's a 1.5" fall. Water toward a foundation is the most expensive mistake on this list.
- Cut control joints on time
Joints go in within 6-12 hours of the pour (or tooled during finishing), at a depth of one quarter of the slab thickness. Late joints crack where they want to, not where you planned.
Rules vary by city and county — always confirm with your local building department. Estimates only, not a permit determination.
Plan it. Price it. Build it.
Enter your own dimensions and get this same plan for your yard — plus the build guide, permit packet and printable PDFs.
Start my concrete flatwork